
Floral Wreath: There Is Spring in the Air Once Again
It is officially the first day of spring – yay! That means now I can take down my wreath of pinecones, faux snow, berries, and turtle doves. I know what you are thinking: “Oh. You’re one of thooose people who are too laaazy to take down their Christmas decorations. Gross. I can’t even look at you right now.”
Don’t forsake me, friend, let me explain! It isn’t how it looks, I promise! It was not a Christmas wreath that was hanging on my door since December; it was a seasonal winter wreath, and you cannot hold that against me because the winter season officially ends in March. I am innocent of all charges. (That is my story and I am sticking to it 😊).
Anyway, with it being March and colorful flowers and greenery emerging everywhere (and even snow sideeye) I wanted to purchase a floral spring wreath to reflect the rejuvenation outside. I searched everywhere but did not find a wreath that I liked enough to pay for, so I decided to make my own. It was my first time making a wreath, and I am happy with the result!
Here is what I did.
Supplies Used
18-inch natural grapevine bare wreath
10 multicolored orange, red, and yellow floral stems
2 pink floral stems
Tools Needed
Scissors
Hot glue gun and glue stick
Steps
Step 1: Deconstruction


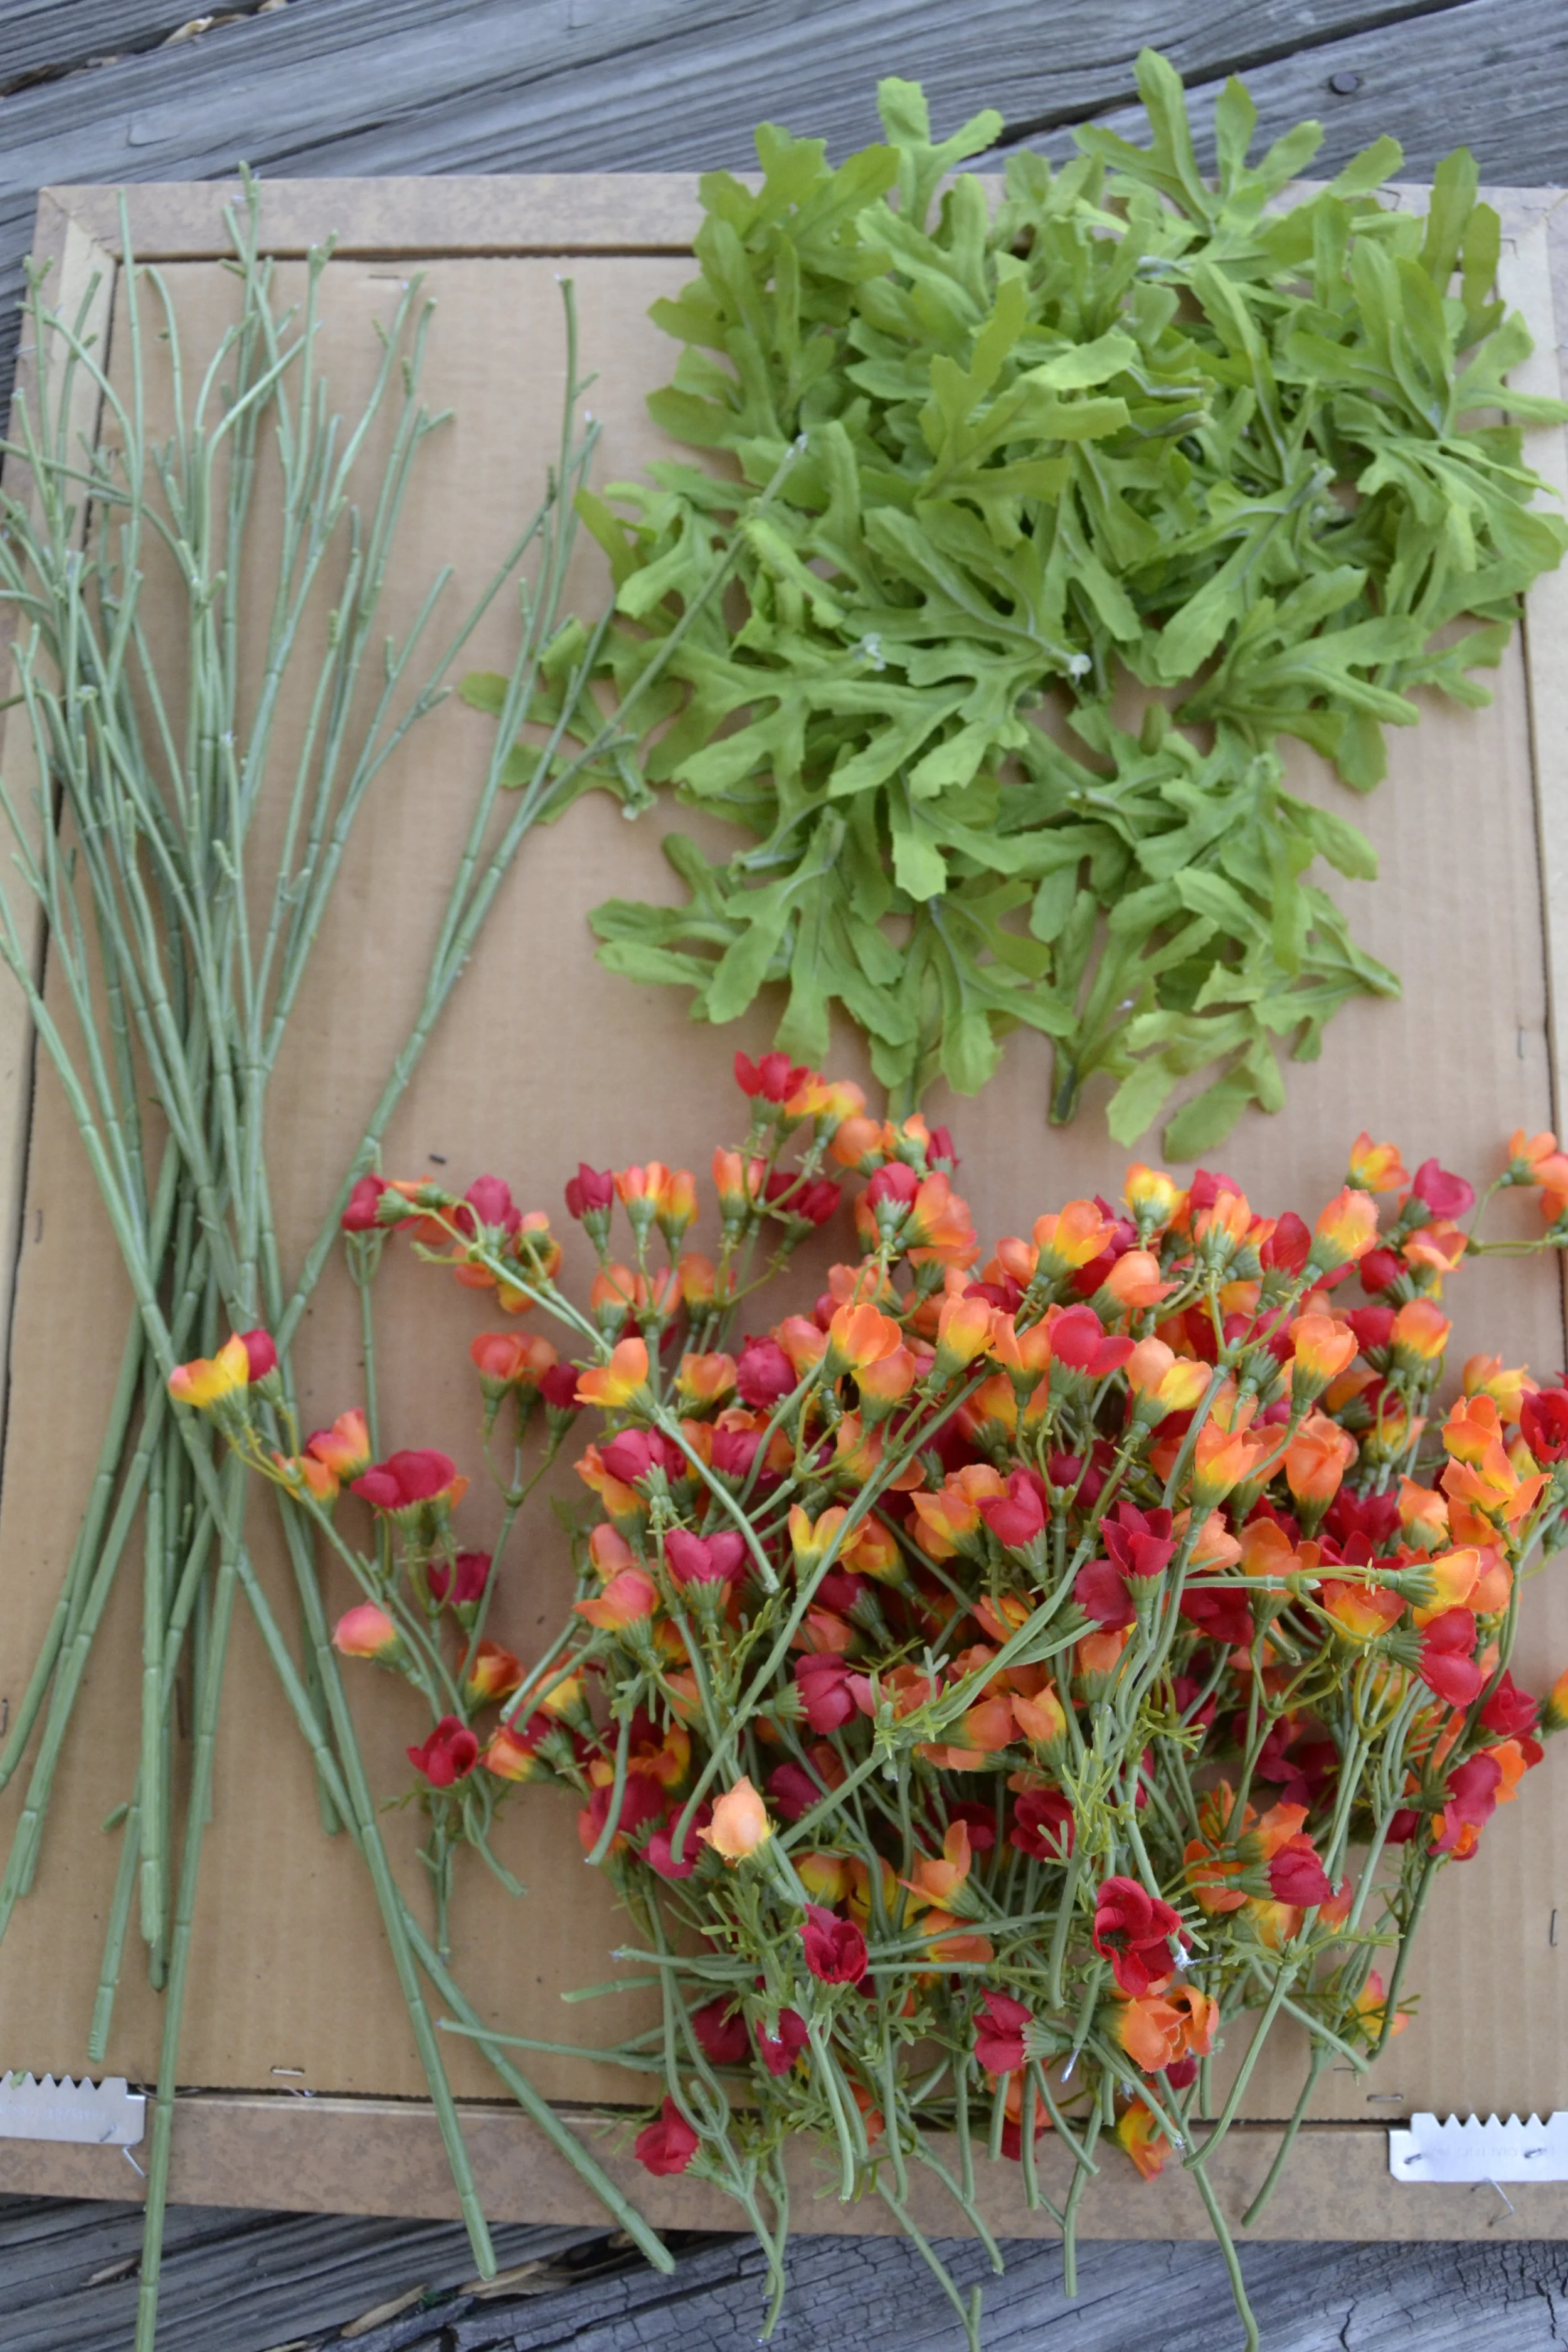
I wanted my wreath to be very colorful with green, orange, red, yellow, and pink, but with pink being the least abundant color. So, to start, I compiled my red and orange floral stems, and then I deconstructed them. The green leaves on the stems were able to be removed simply by pulling them off. The flowers on the other hand had to be cut with some strong scissors. I made sure to cut them at the base of the node.
Step 2: Green the wreath (layer 1)

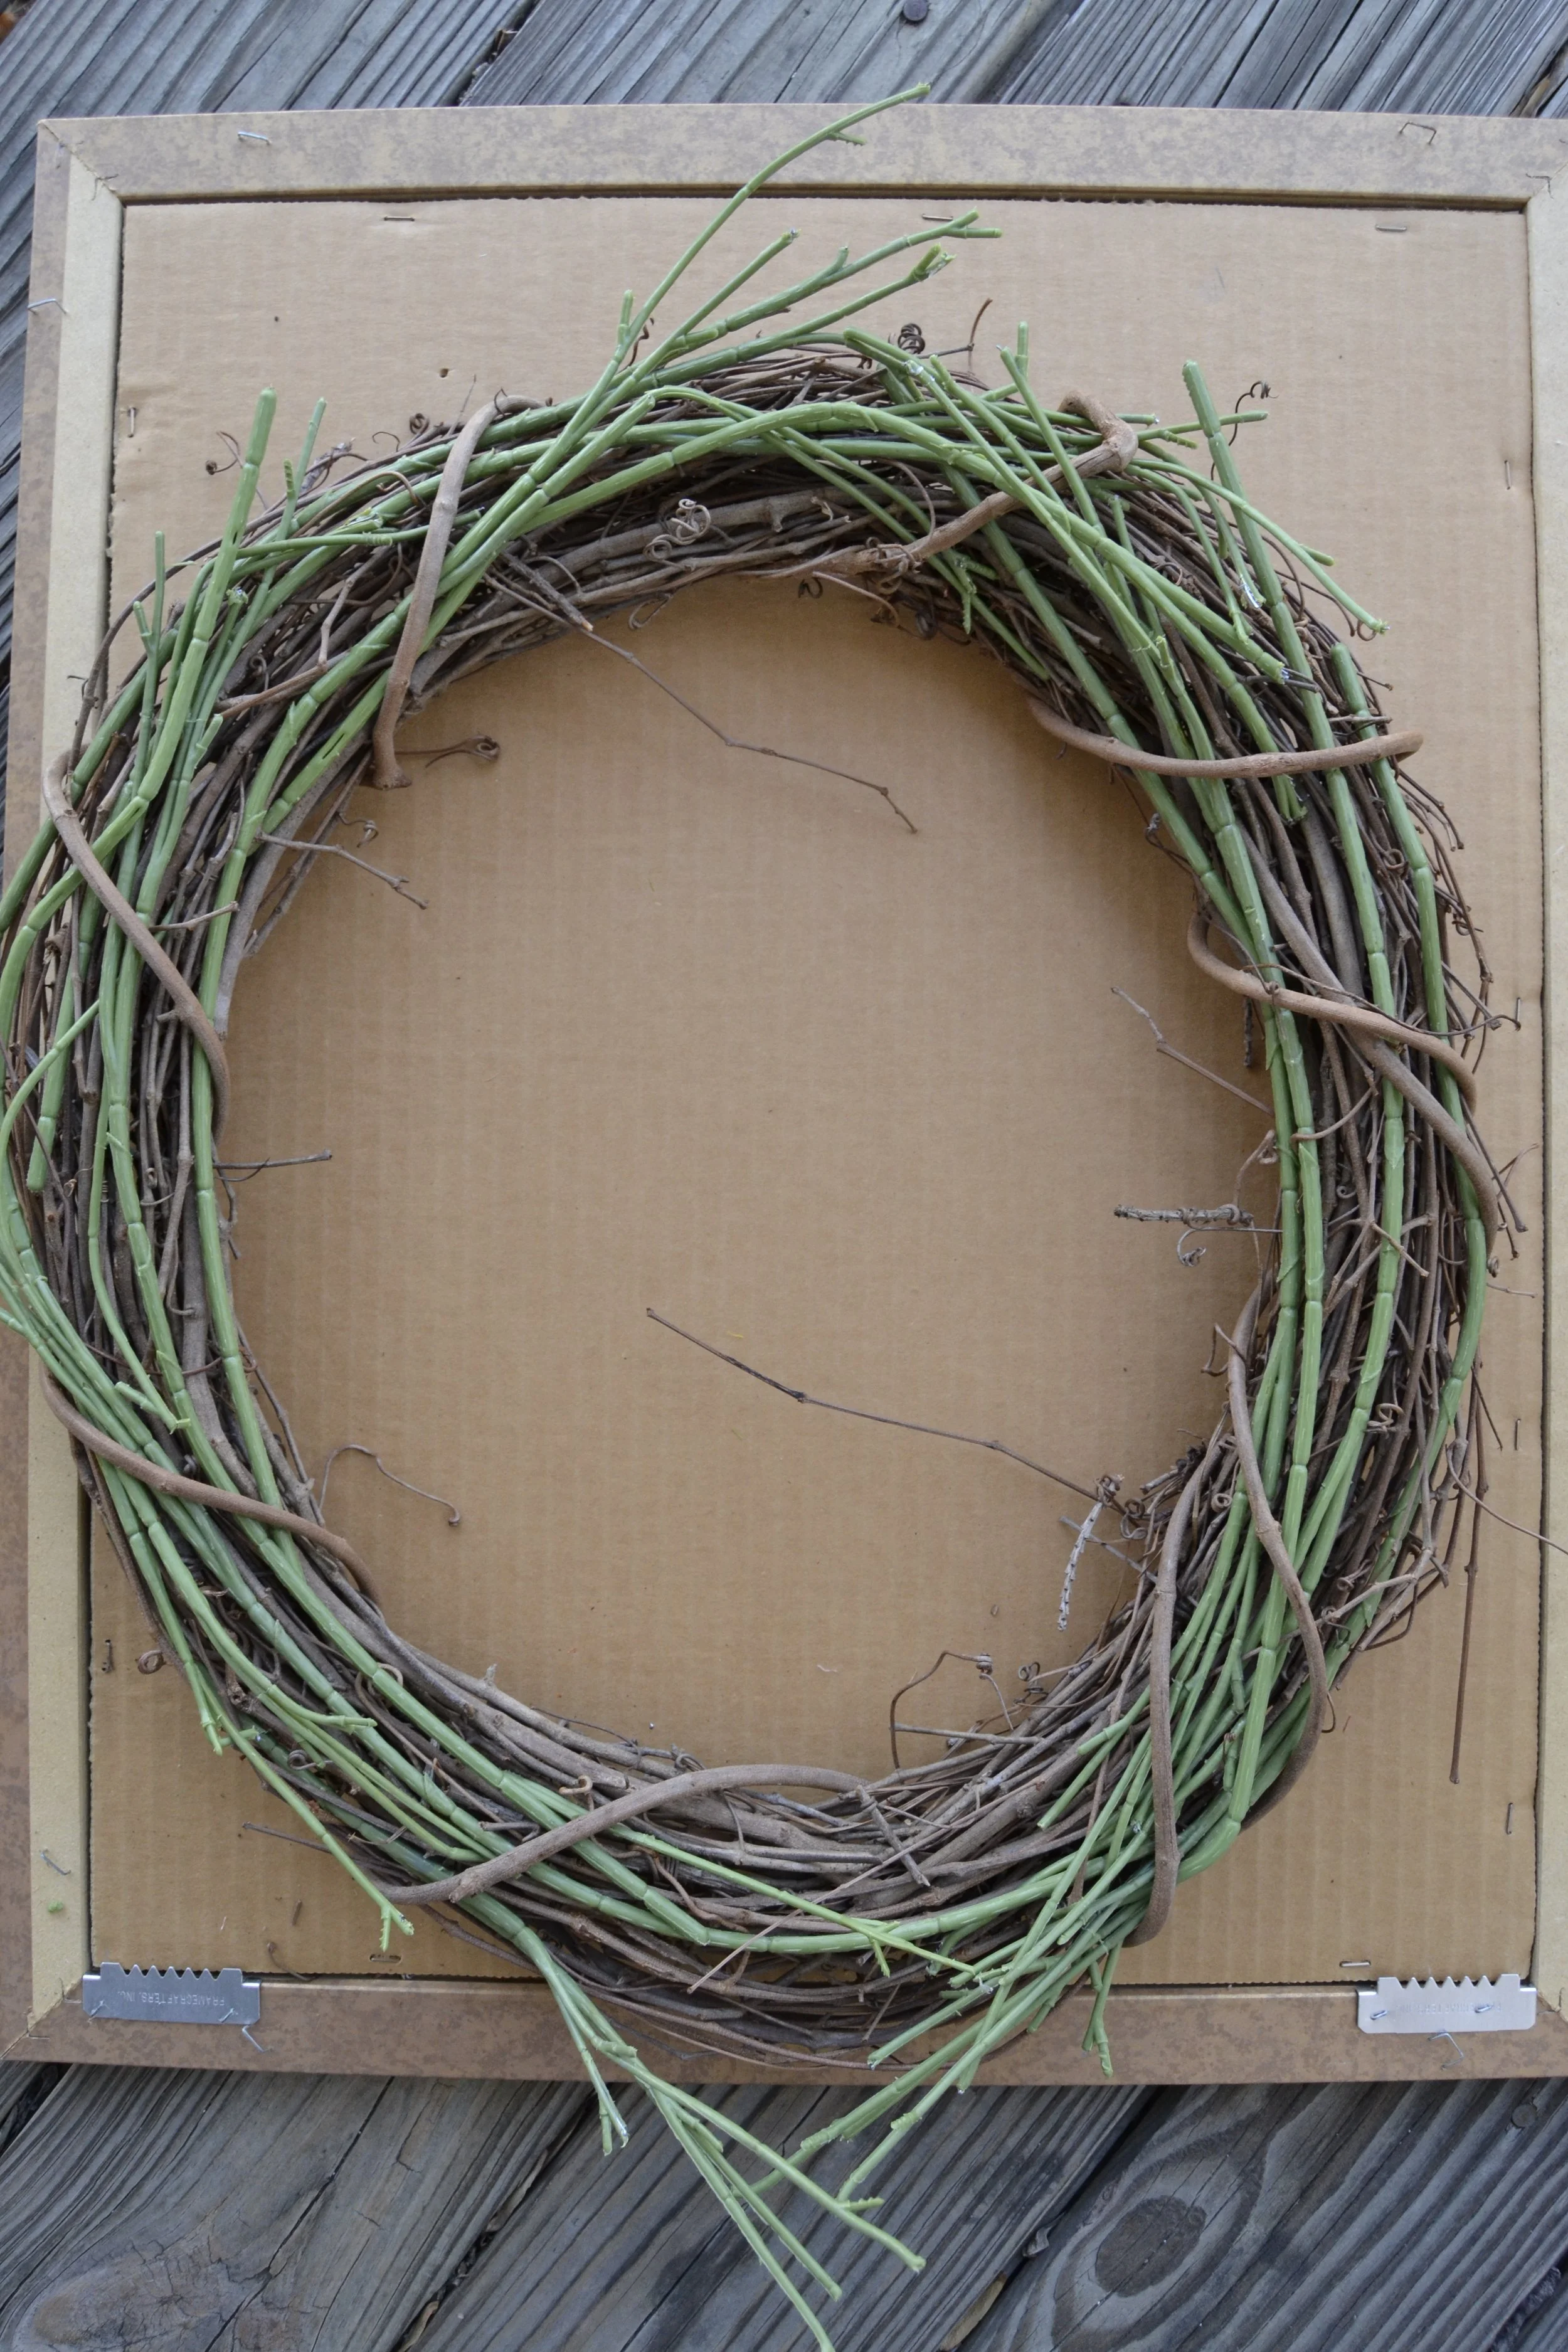
The base of my wreath was a standard grapevine wreath typically found in any craft store. To make the base of my wreath look green, I first utilized the green stems remaining from Step 1. The green stems were essentially wire with green plastic covering the wire. As such, the stems were neither very pliable nor were they able to be glued easily to the grapevine. I ended up sticking the green stems through spaces in the grapevine and making a circular green layer.
Step 3: Green the wreath (layer 2)
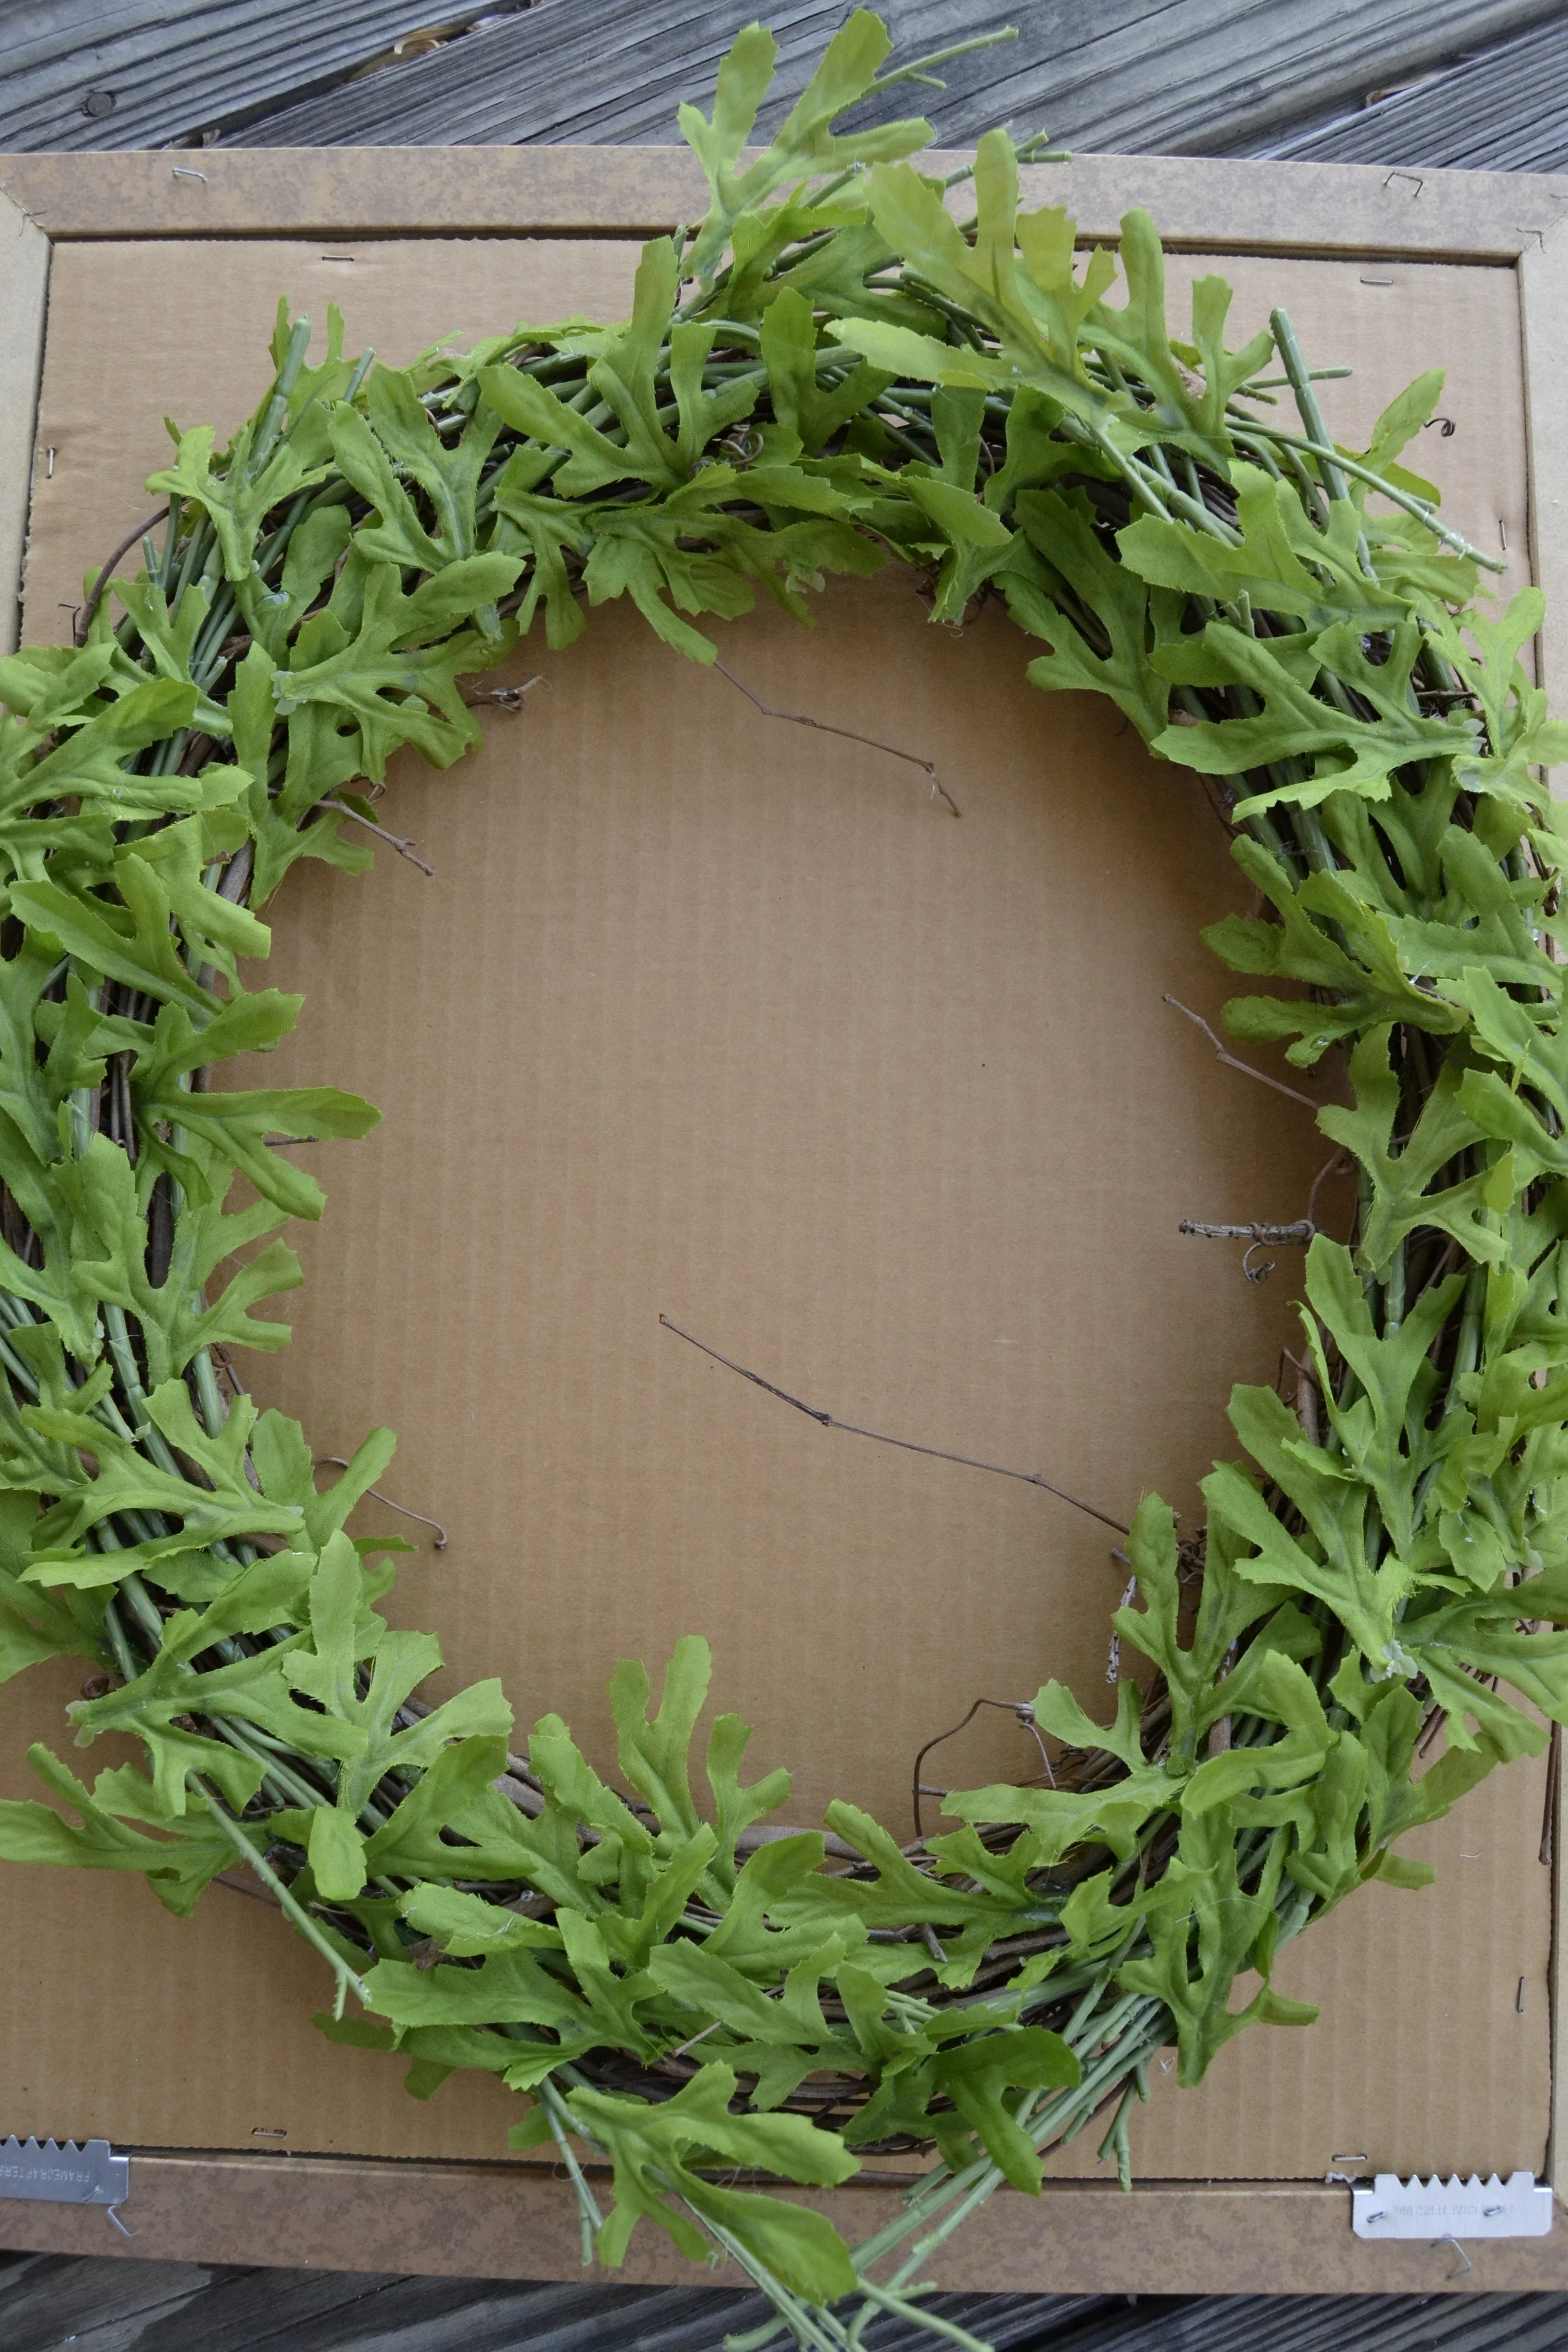
Next, the deconstructed green leaves from Step 1 were hot glued onto the base, ensuring that the brown grapevine and green wires were covered as much as possible.
Step 4: Flower the wreath (layer 3)


For this next step, I took the orange and red flowers from Step 1 and strategically stuck them through the base. The flowers were able to stay in place on their own without glue as long as they were embedded deeply enough into the grapevine. After no more flowers remained, I took two full pink flower stems and stuck them through the grapevine while shaping them into a single circle.
Step 5: Hang the wreath!


Then I hung my masterpiece onto my door. Voila! Isn’t she lovely.