The Golden Skunk Console
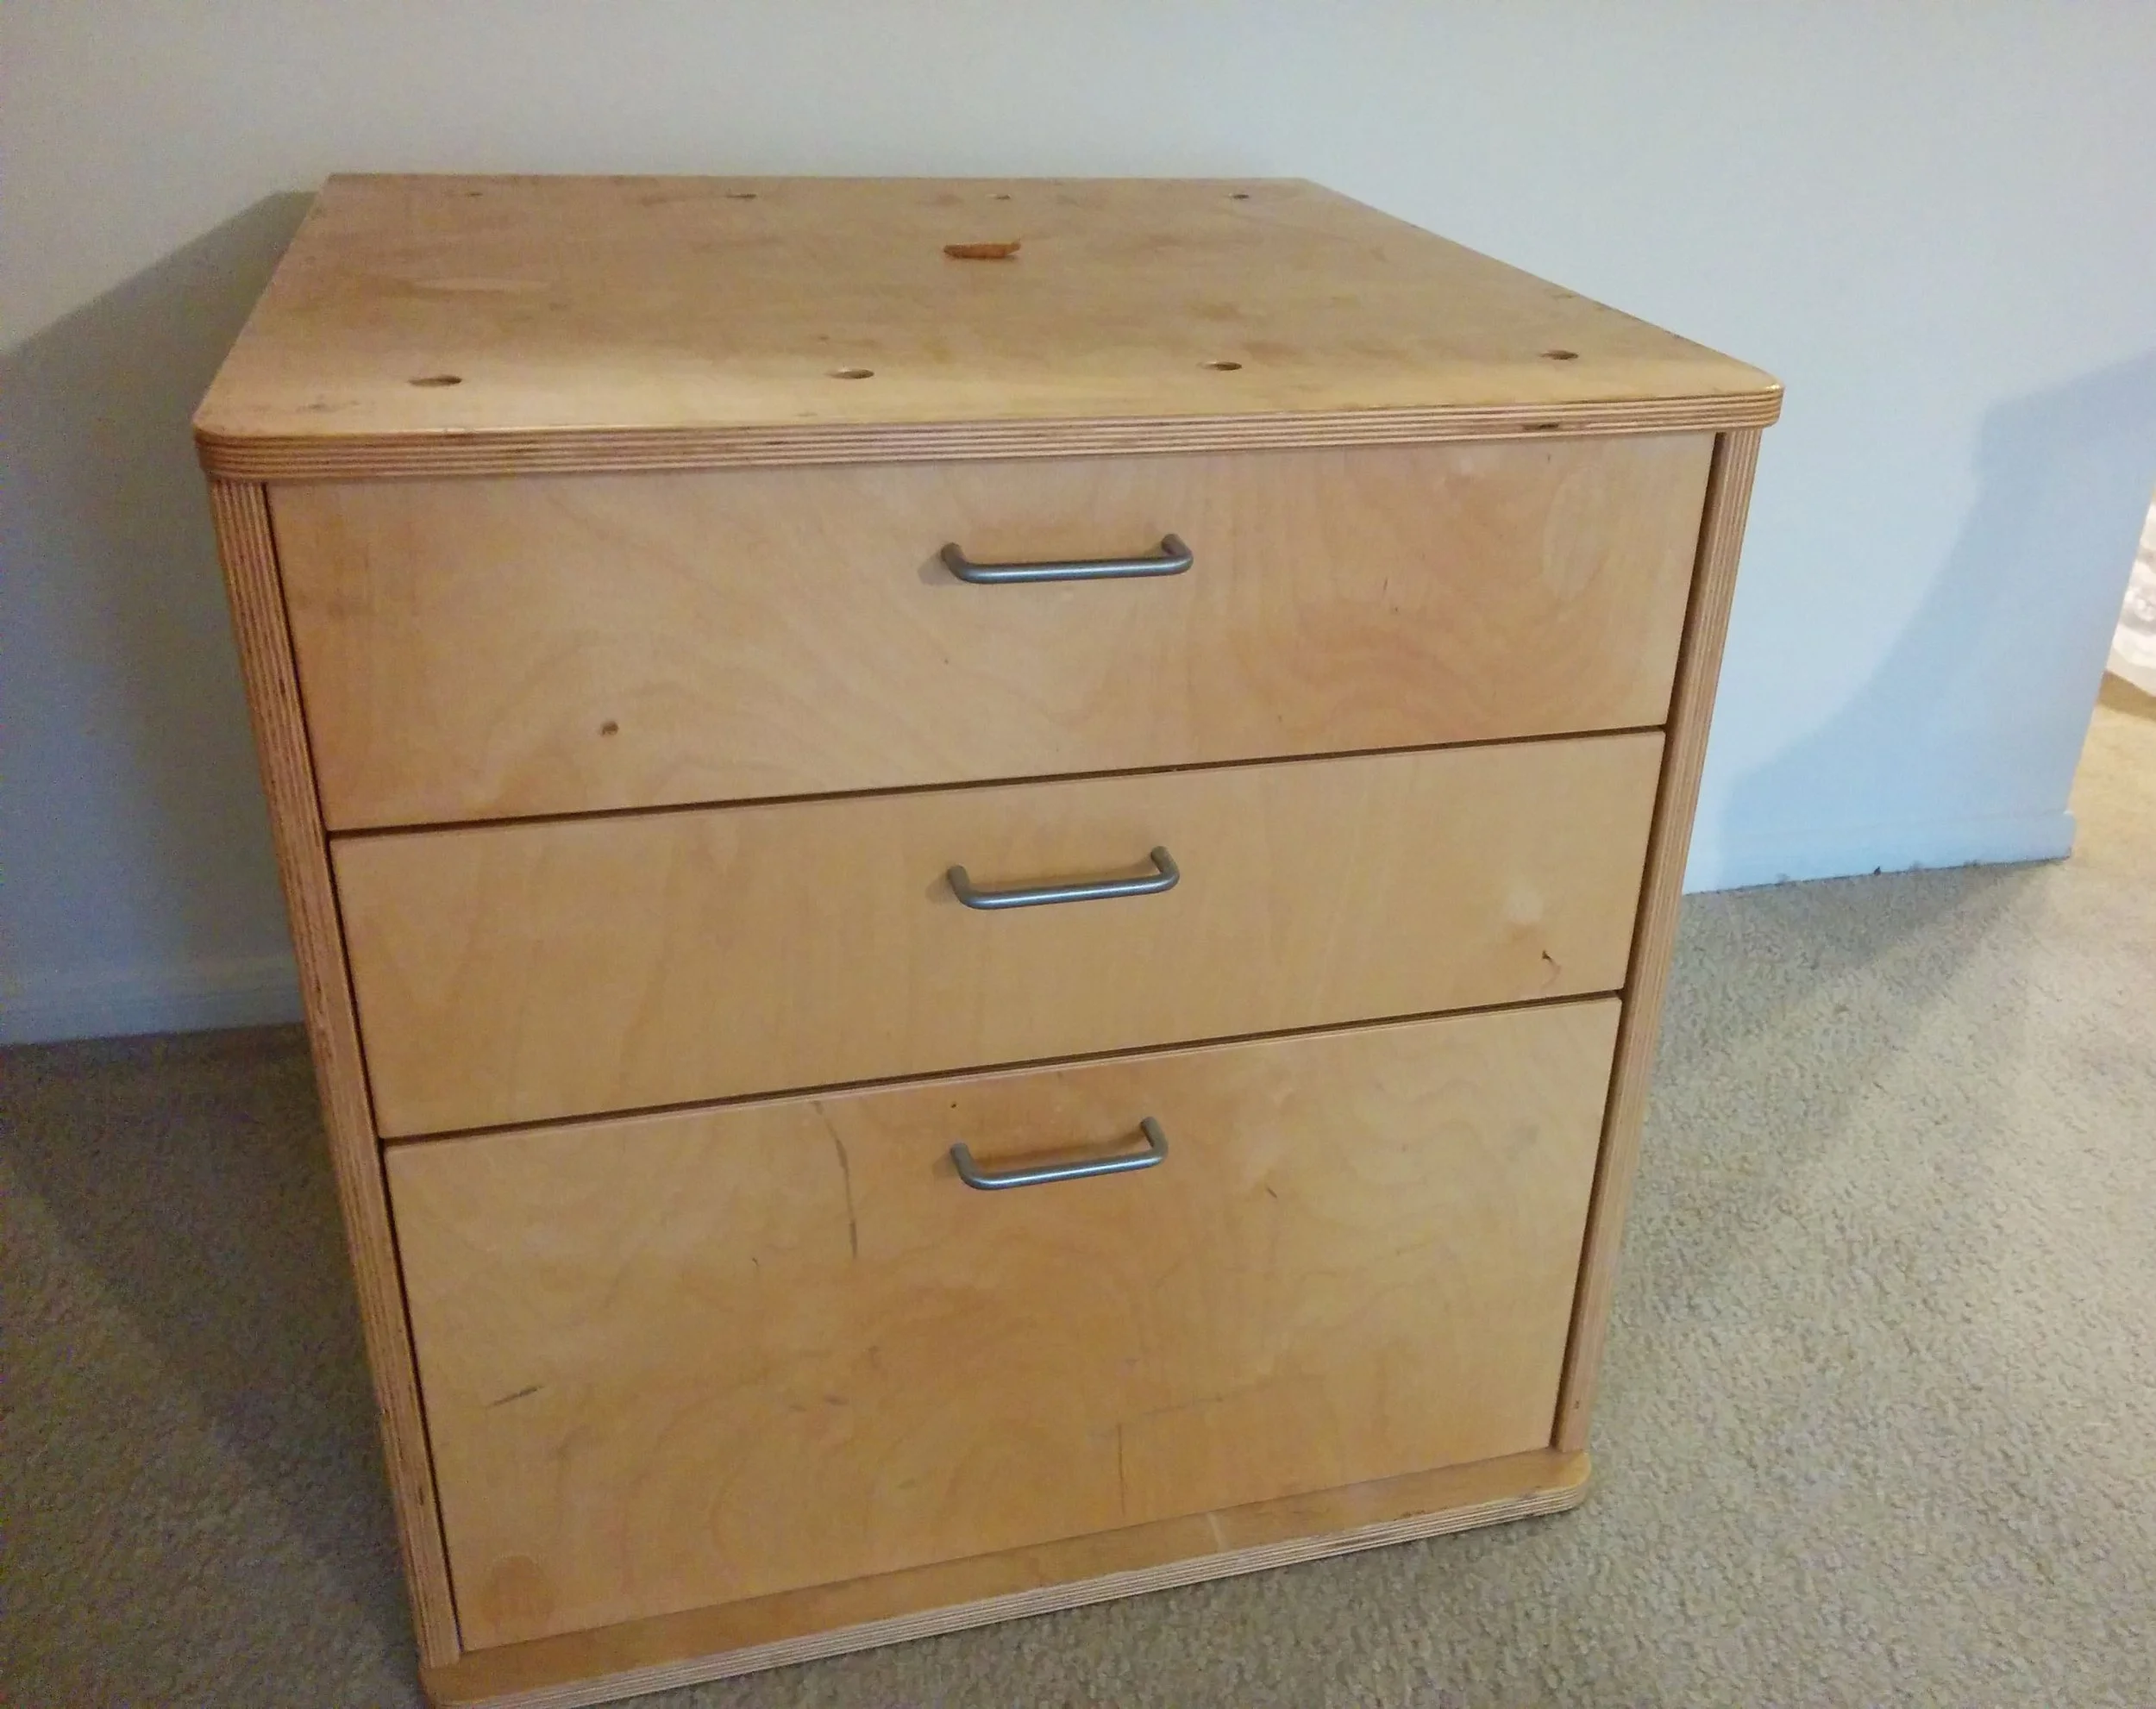
The day started out like any other work day. There were cubicles to navigate, Excel spreadsheets to fill, conference calls to conduct, and of course emails – lots of emails. And then I saw one out of the ordinary pop up. It was a message from the office manager soliciting takers for a few furniture pieces that the office was discarding, so I quickly laced my tennis shoes and did a 20 yard dash to the other side of the building where the forsaken furniture was sitting. You see, I had been itching to work on a furniture makeover project, and I saw this as my opportunity! That day I became the proud owner of two solid wood filing cabinets.
I don’t know about y’all (yes, I said “y’all”), but I am pretty particular about how I want things to look and function. And I don’t like having to spend a ridiculous amount of money to get what I want. After looking at hundreds of pictures of designer furniture and doing a lot of “how-to” research, I decided that I wanted to transform my filing cabinets into a tv console.
So I gathered supplies.

Supplies Used
Two free cubed wooden filing cabinets
Wood filler
Black high gloss enamel paint (I used this Rustoleum)
White high gloss enamel paint (I used this Rustoleum)
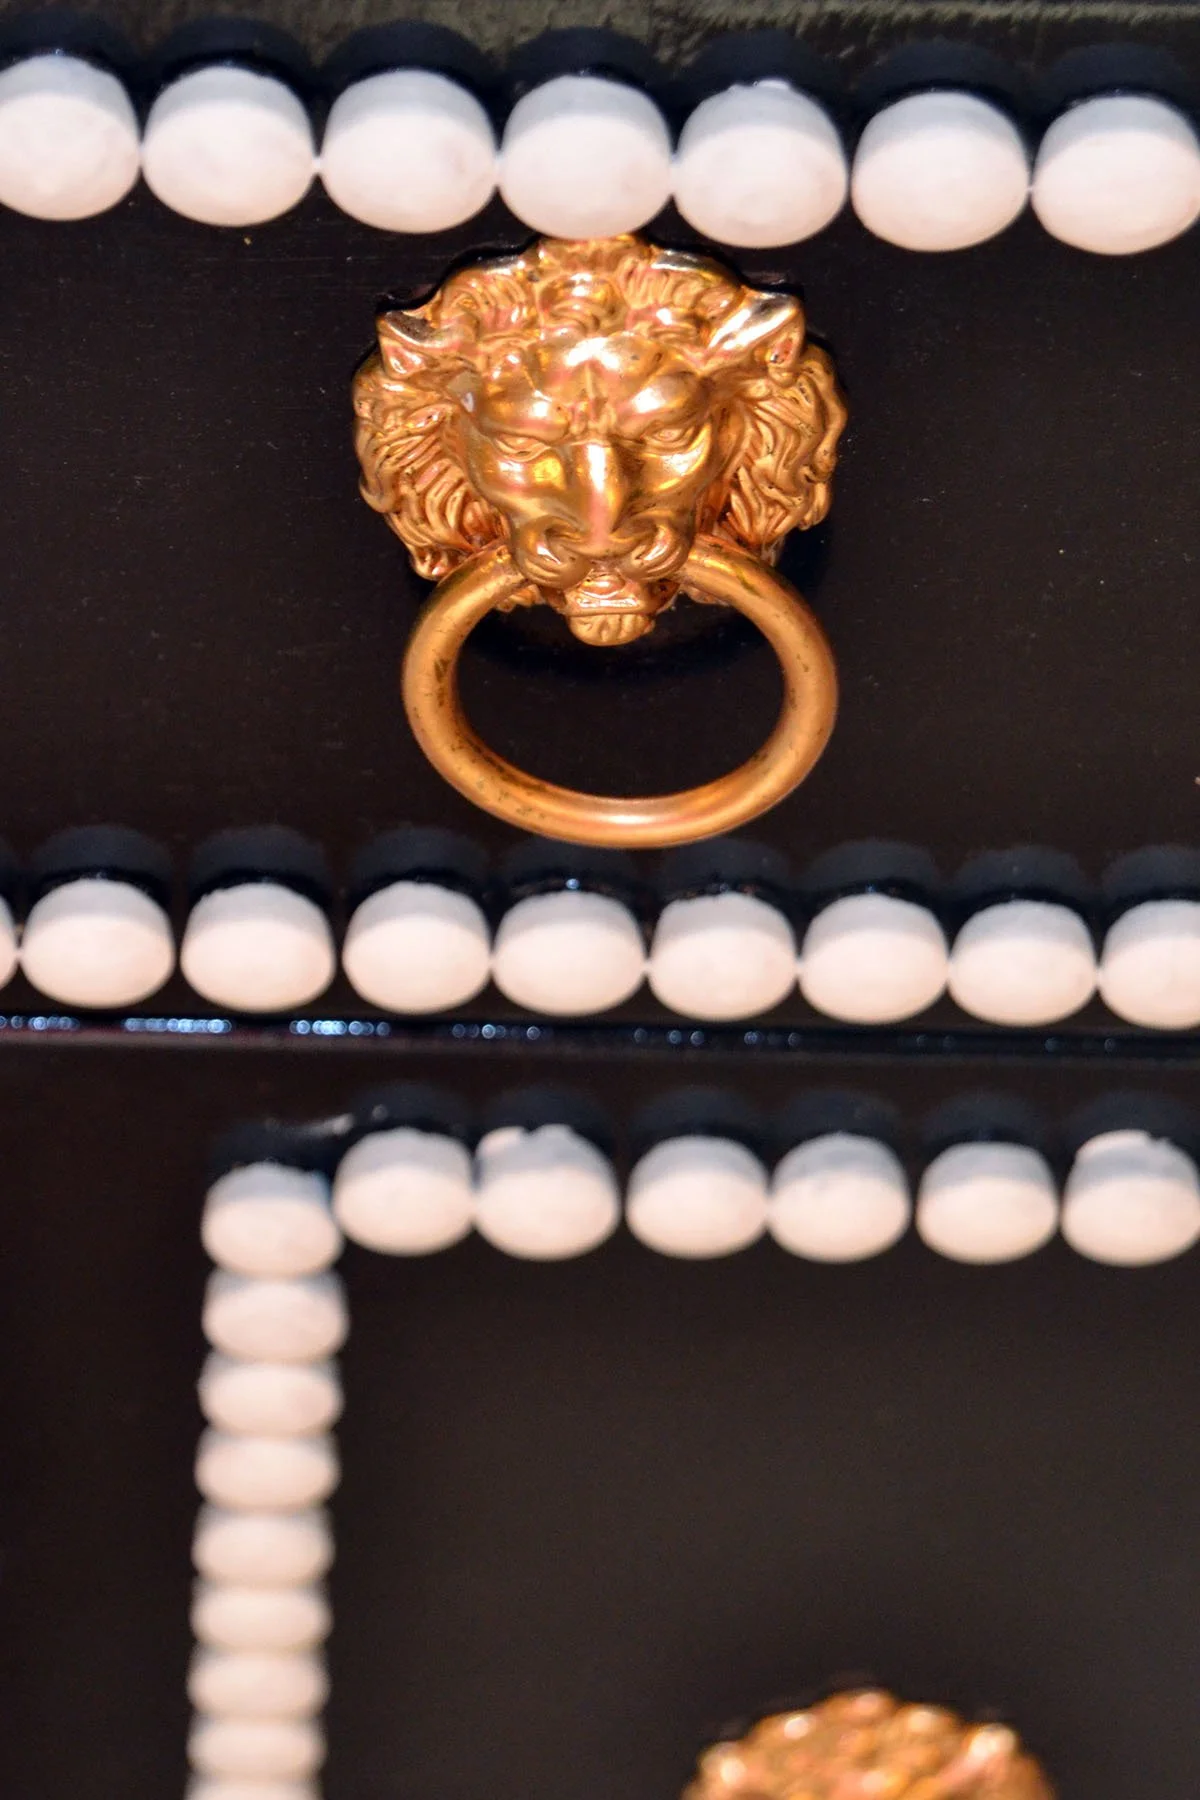
Six cute lion head drawer pulls
Elmer’s wood glue
Gold liquid gilding
Round wooden head plugs
Teal paint
Tools Needed
Screwdriver
Sander (electric preferred)
At least two paintbrushes, including one you won’t ming having to throw away later
Ruler / tape measure
And I got to work.
Steps
Step 1: Hardware Removal
I first removed as much of the hardware as I could (the handles on the outside and the drawer slides on the inside), then I removed all six of the drawers.
Step 2: Setting the Foundation
Though this wood was very sturdy, it had several scratches, cracks, and dents. The most important thing that I learned from researching painting techniques is that you need a good foundation to paint on: a smooth surface that is free of imperfections. This is especially important when using high gloss enamel paint, which highlights any flaws in the wood. As such, I filled the gaps with wood filler and sanded the wood as much as I could.
Step 3: Plan
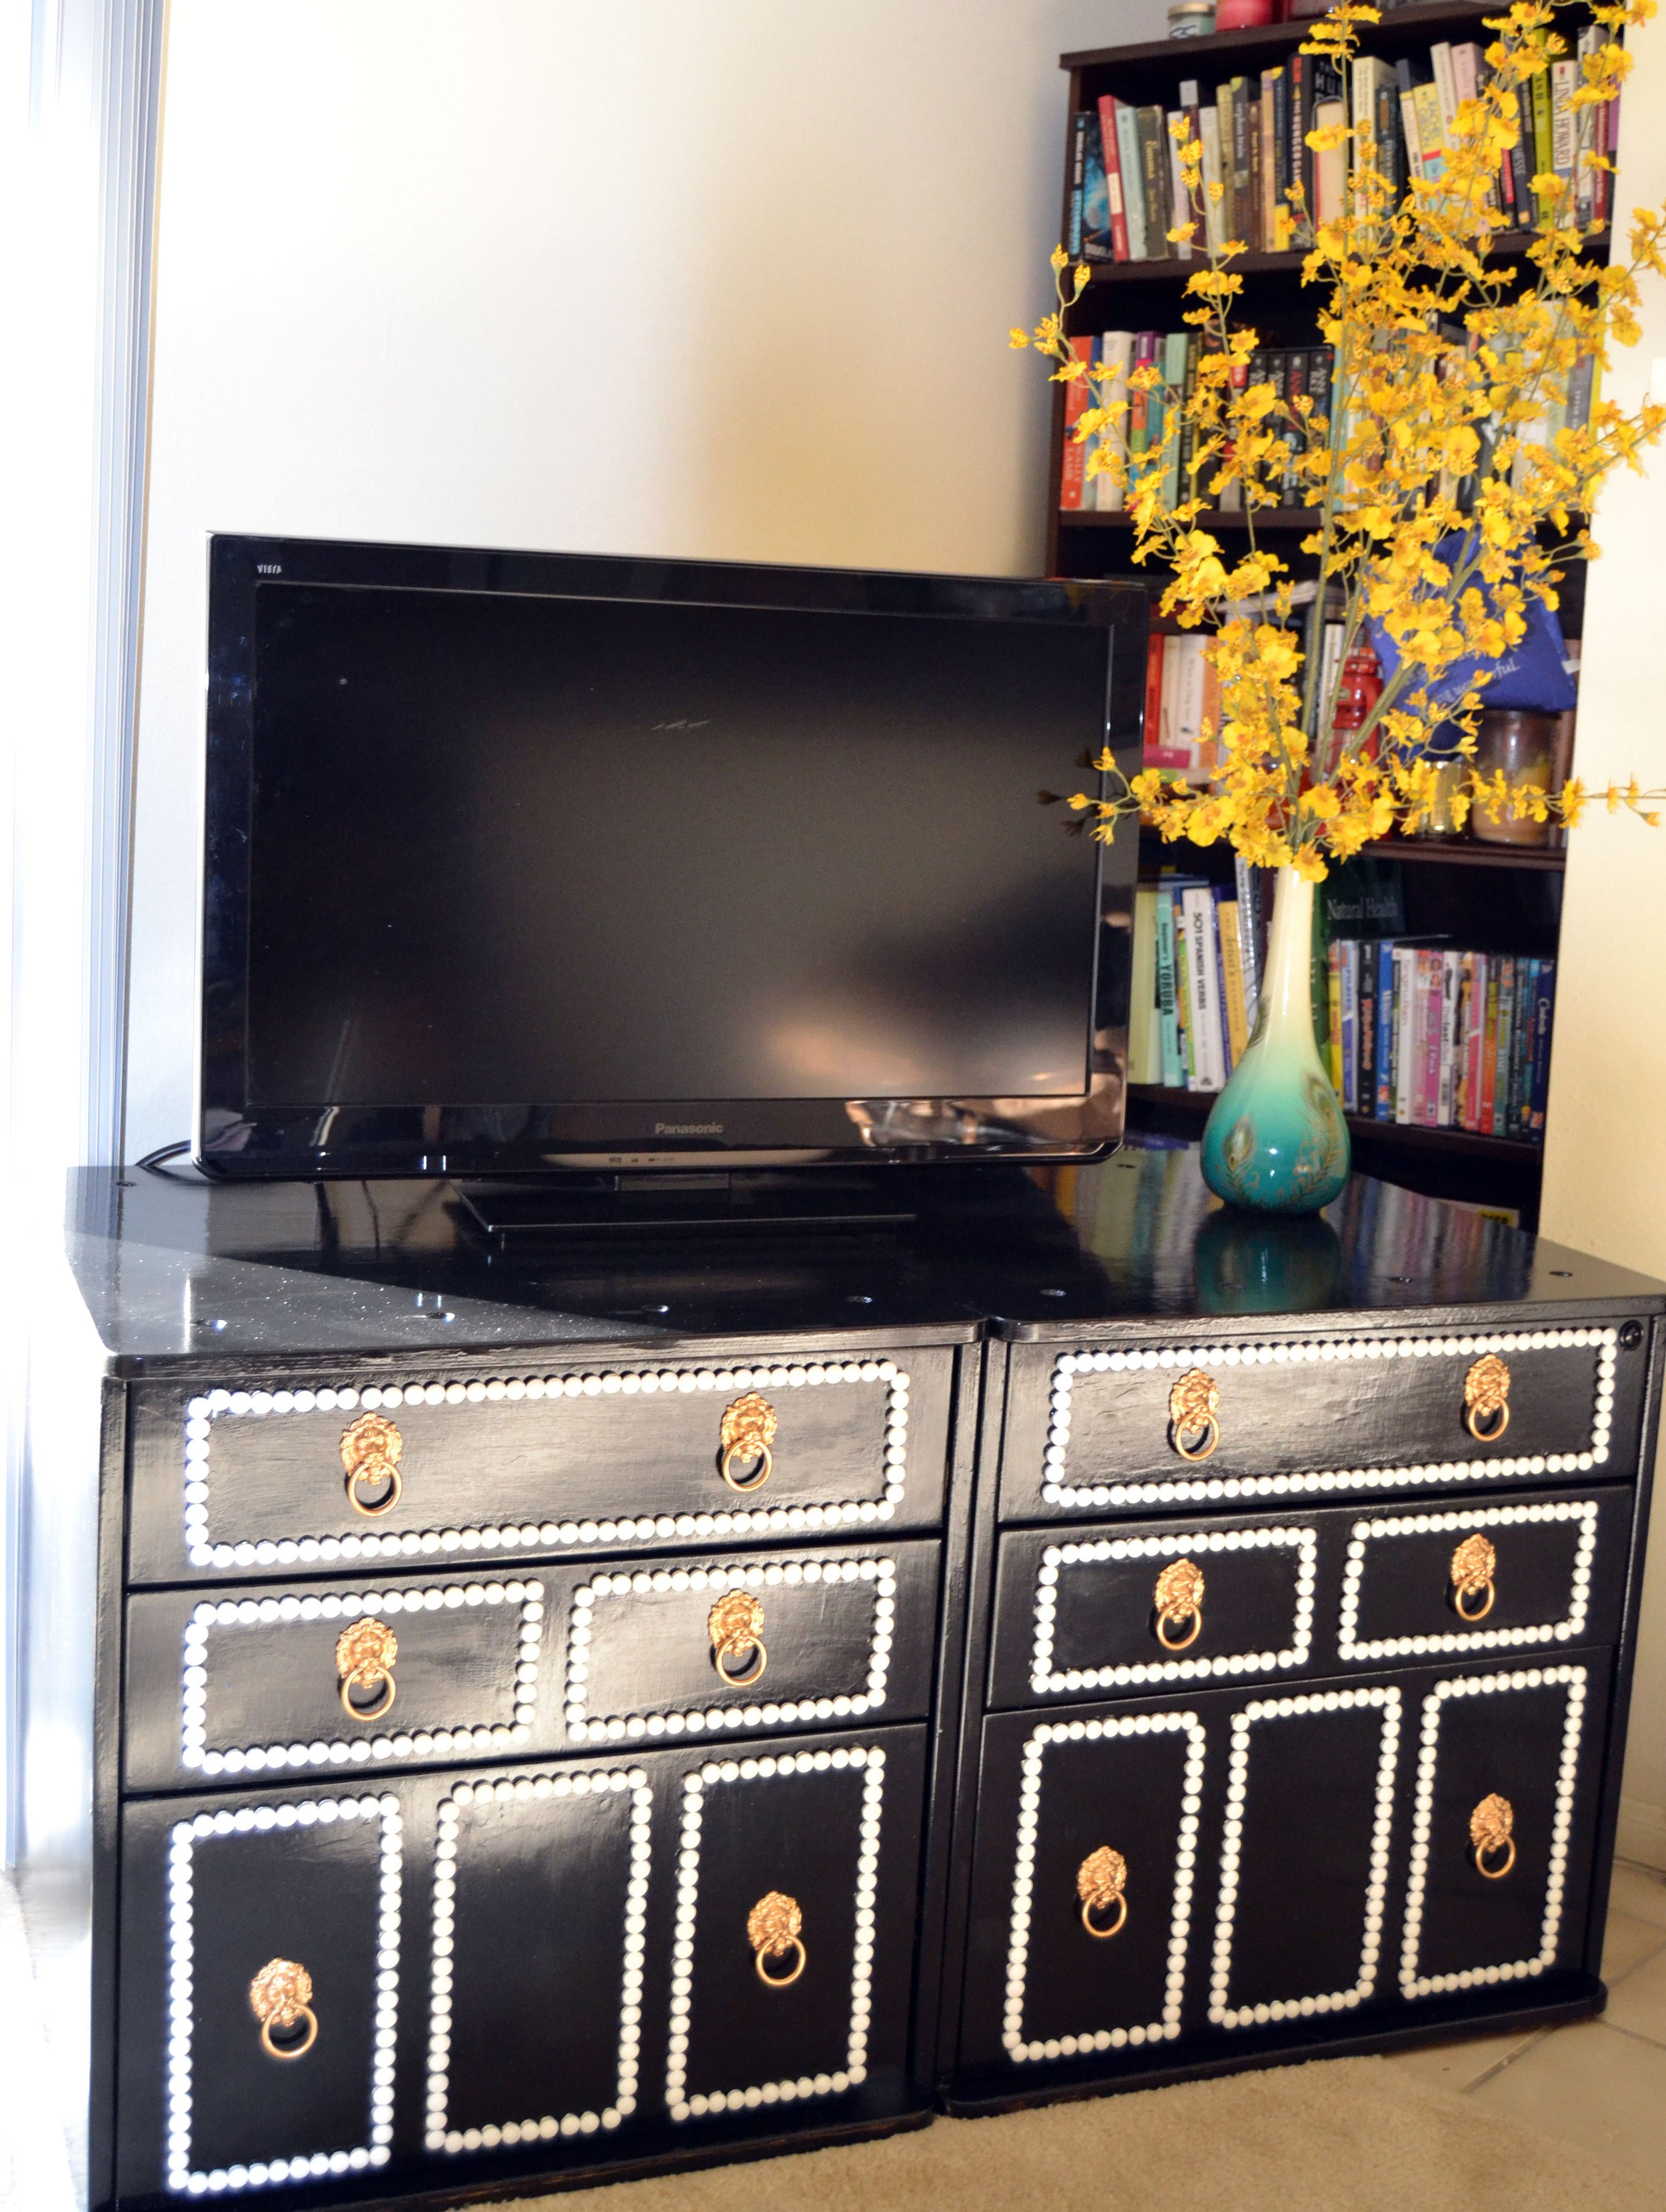
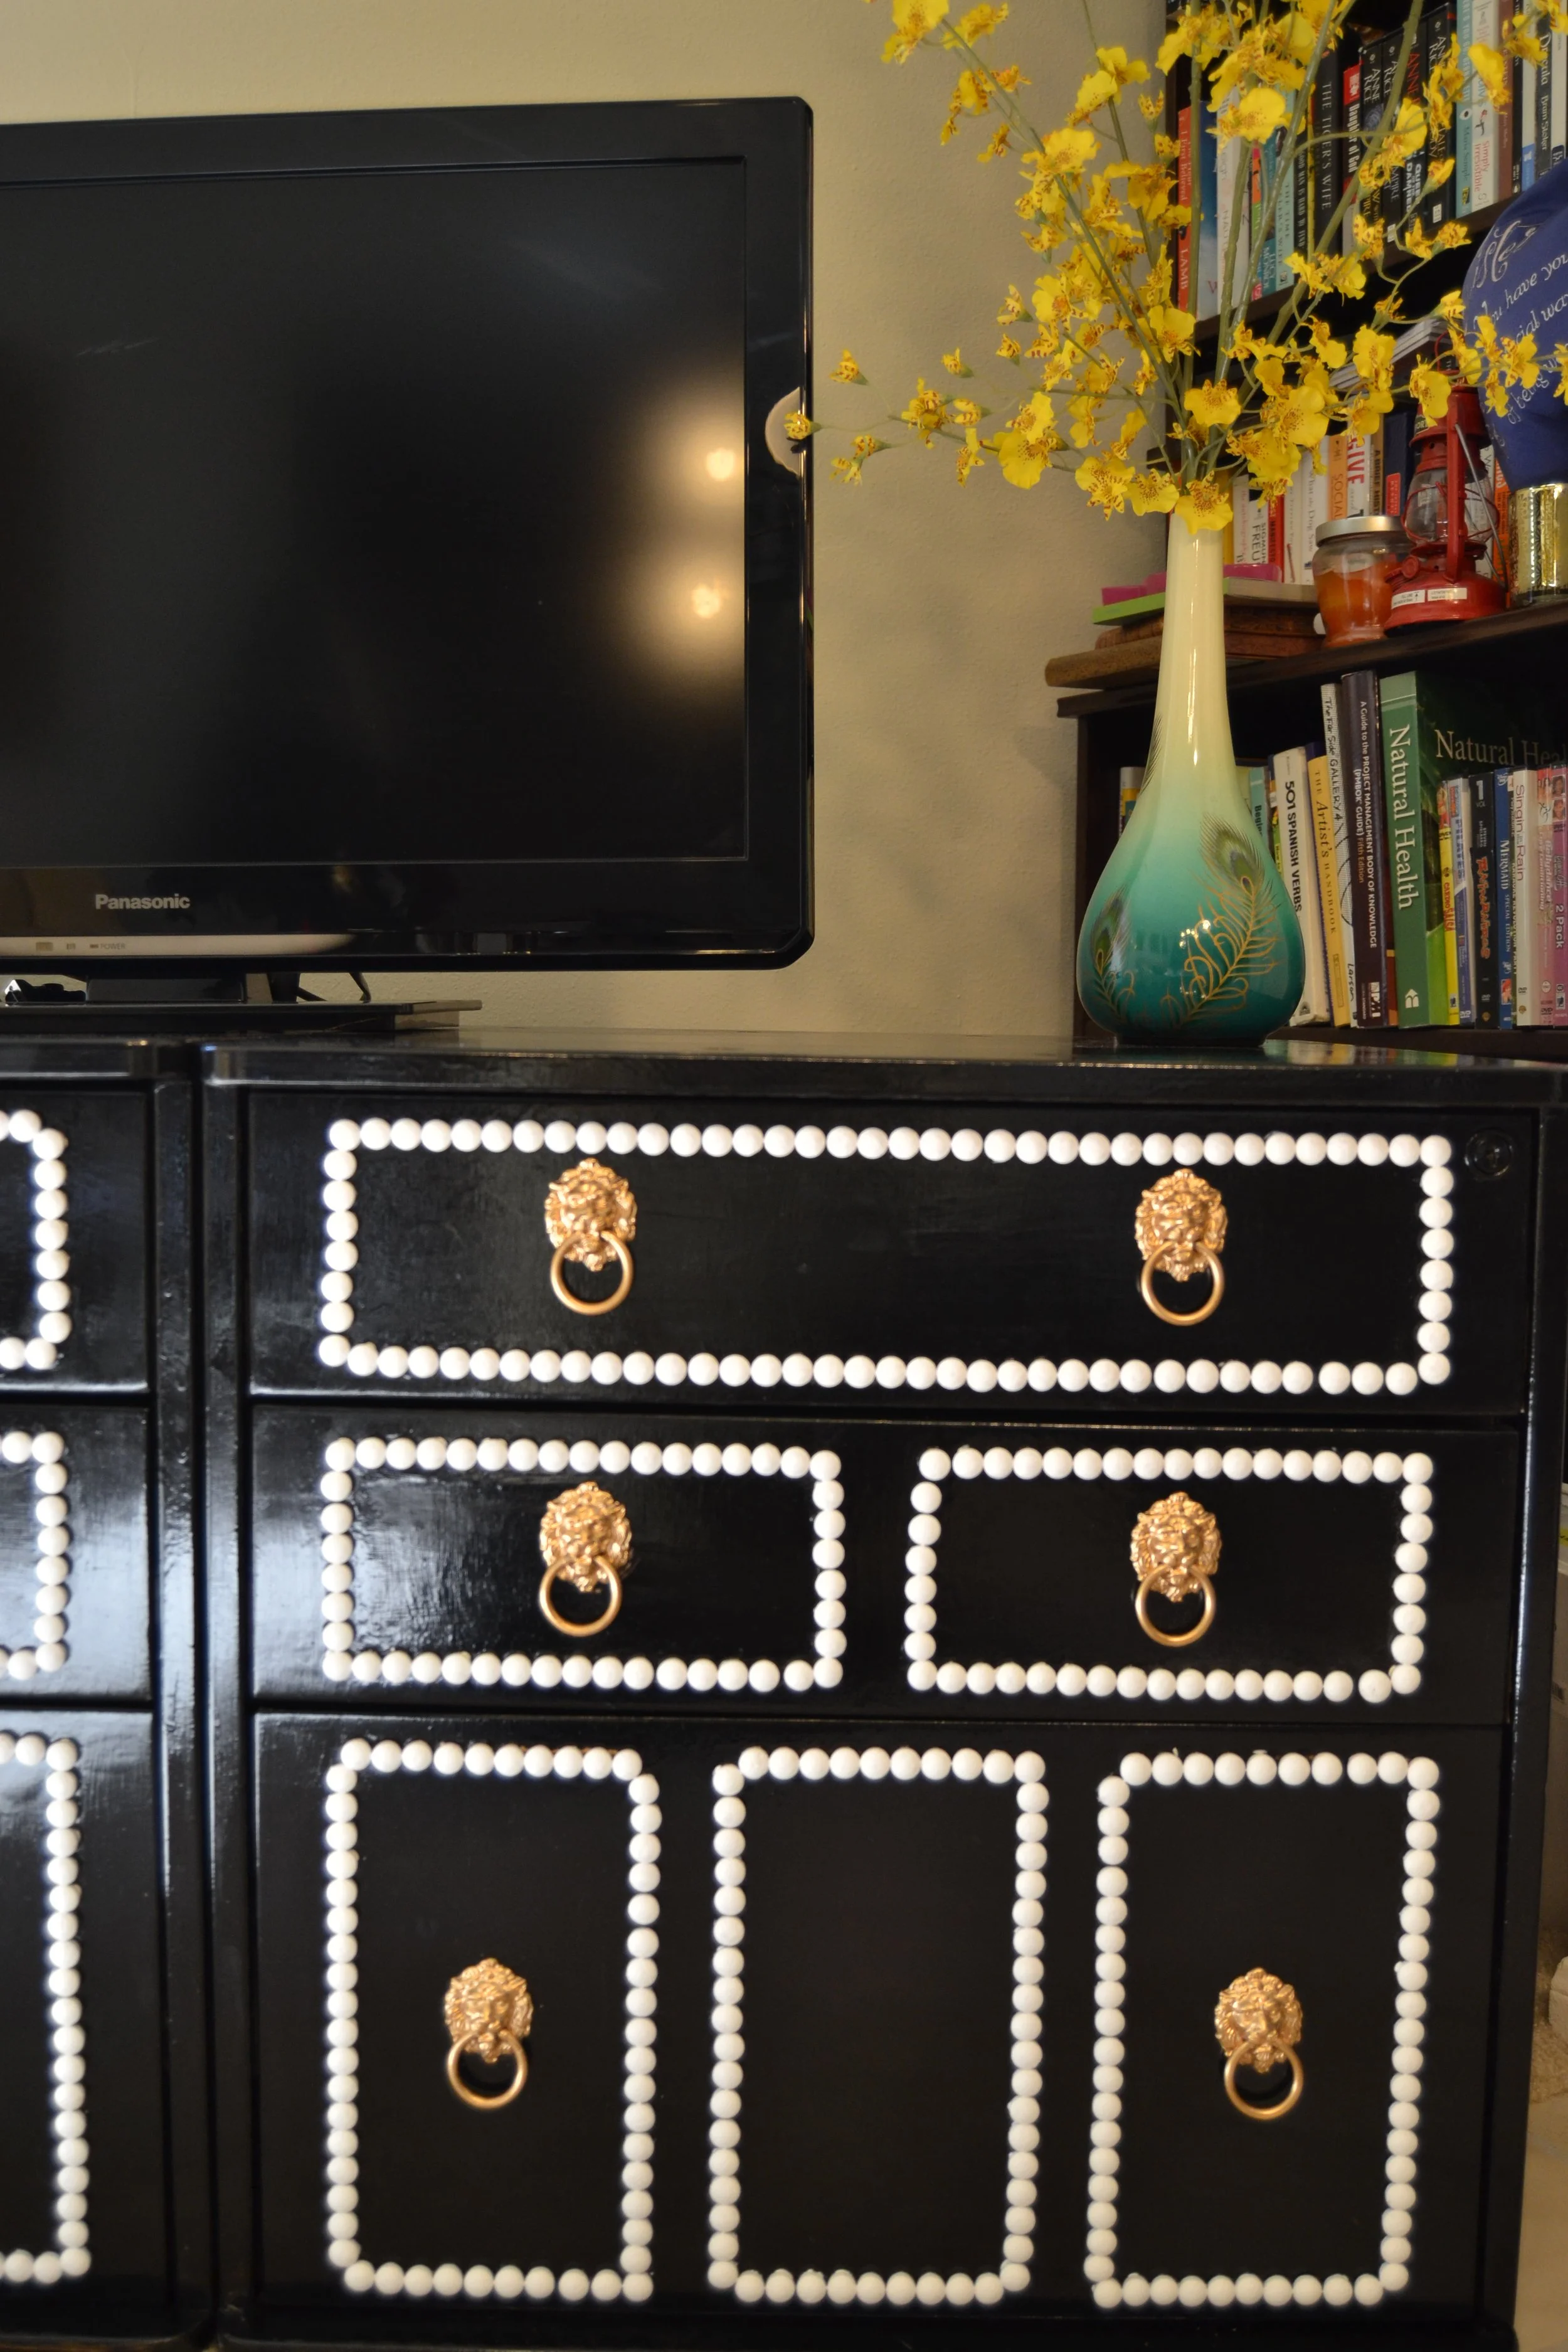
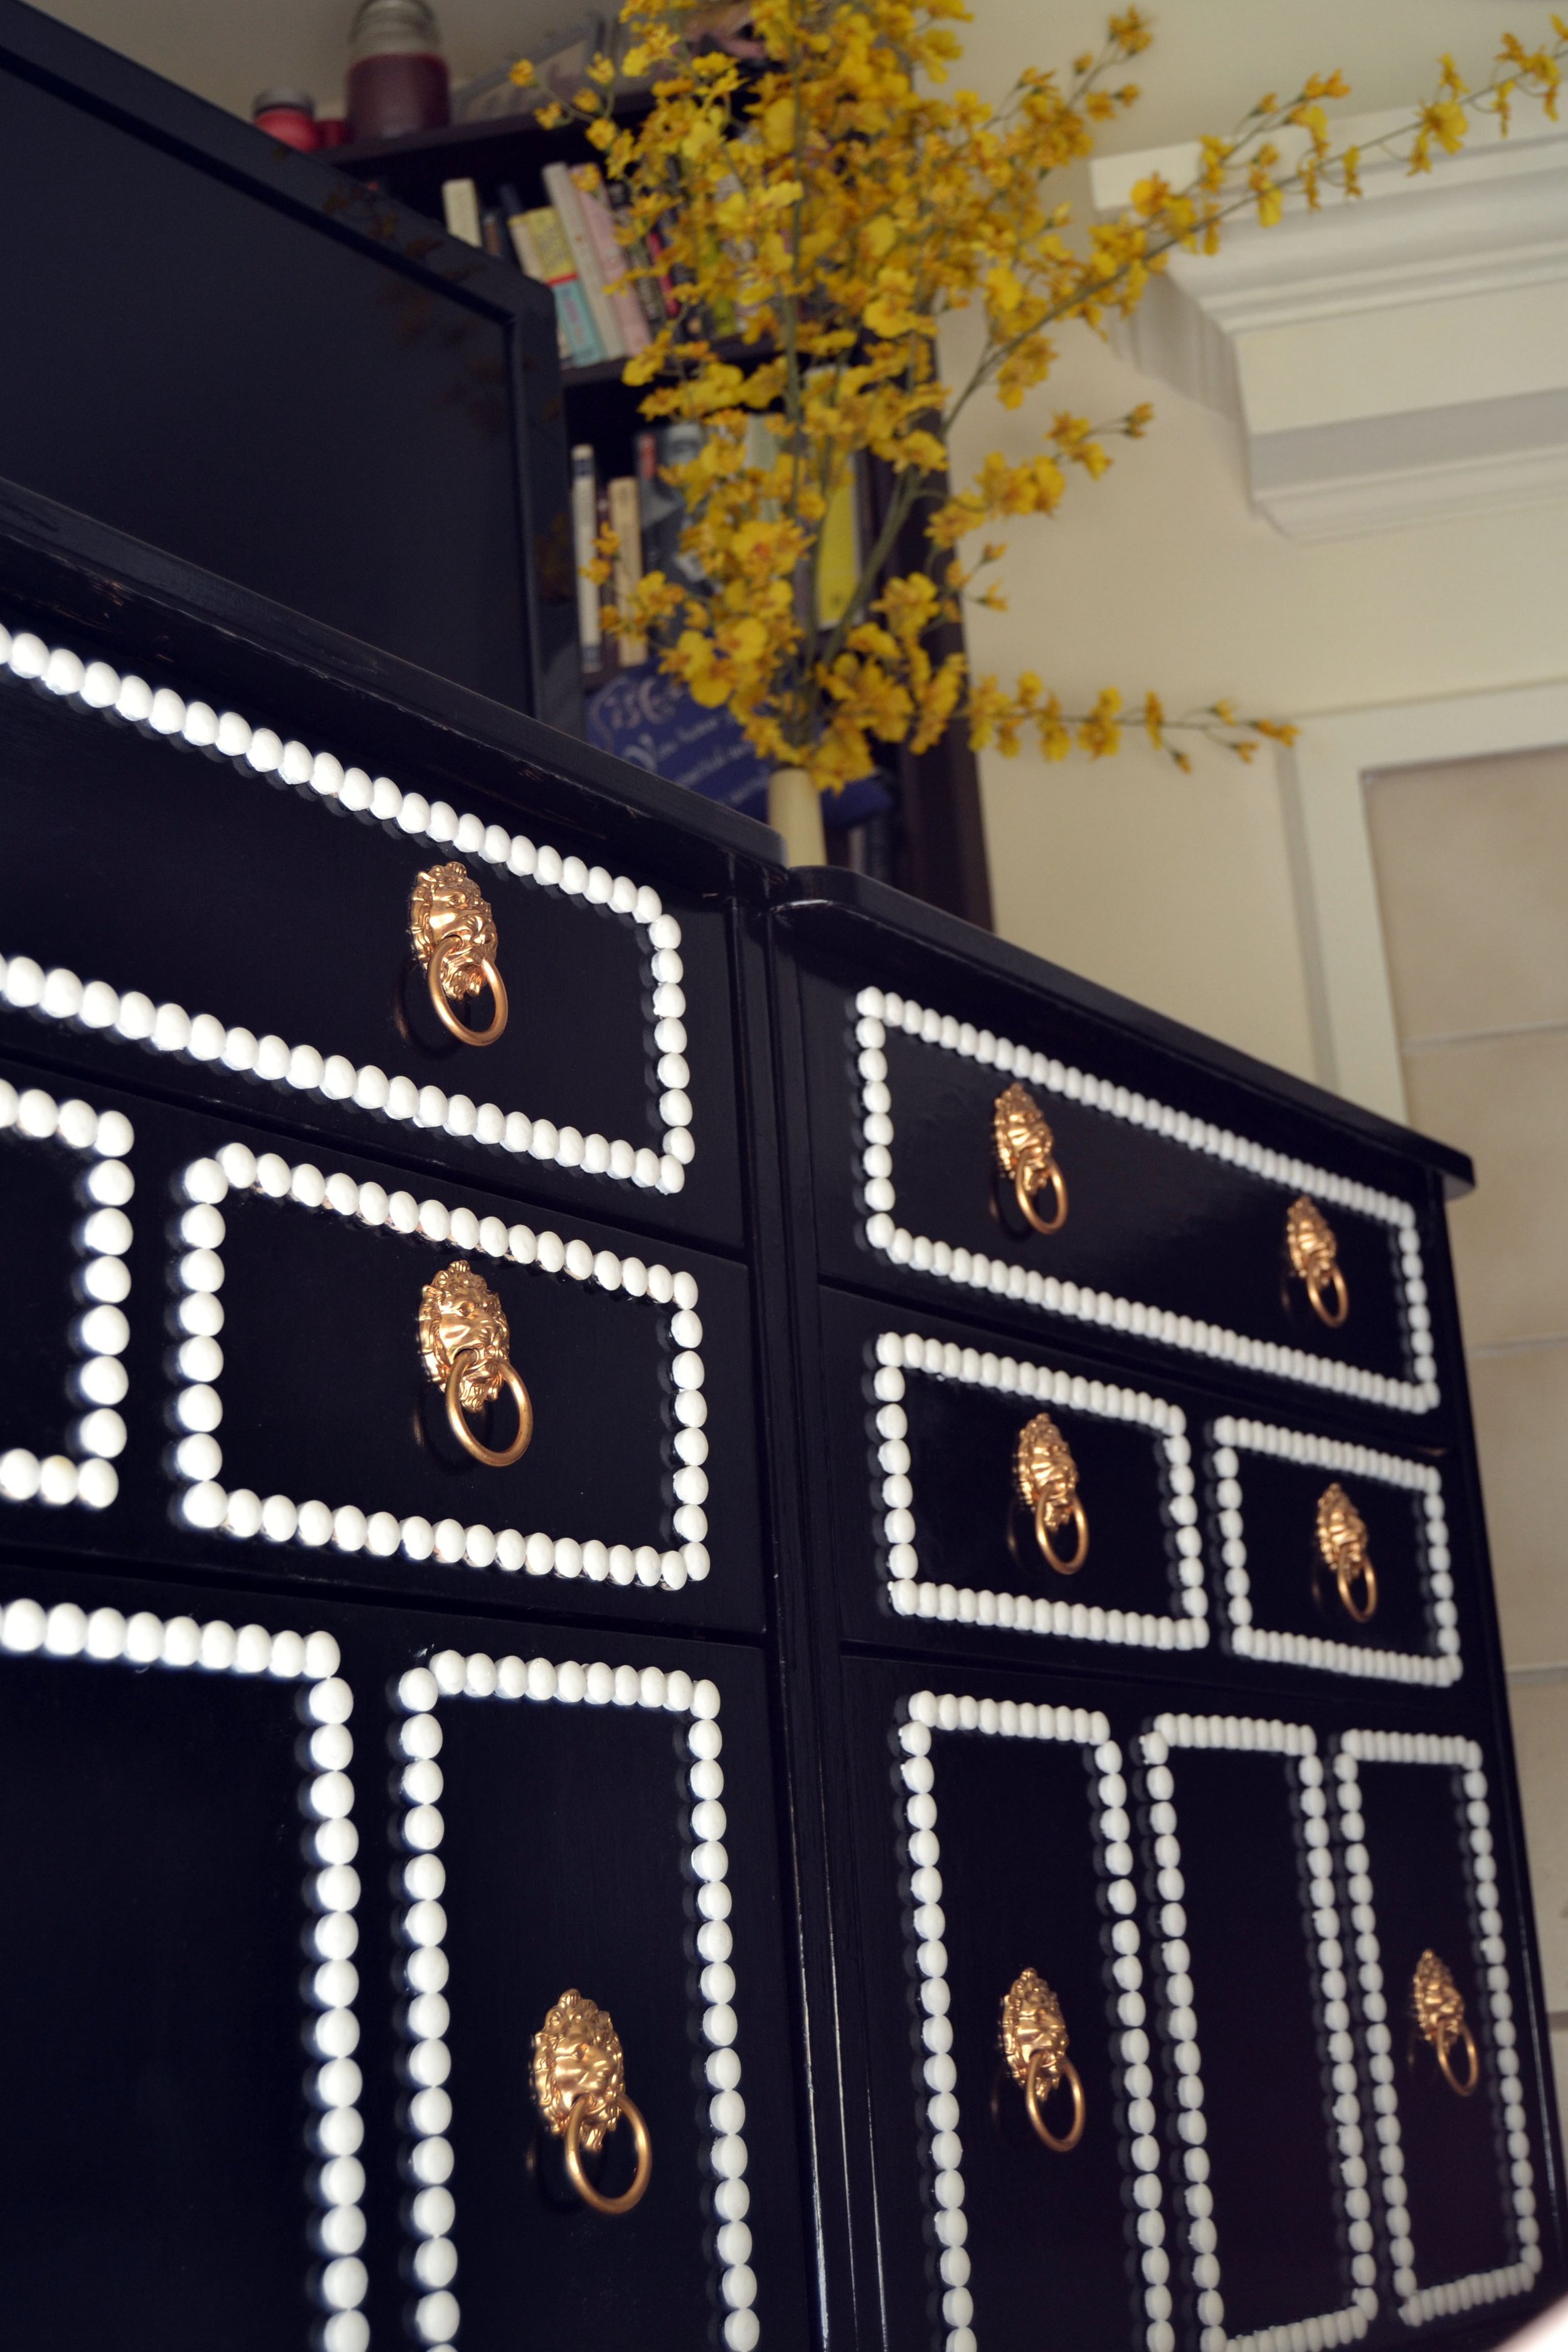
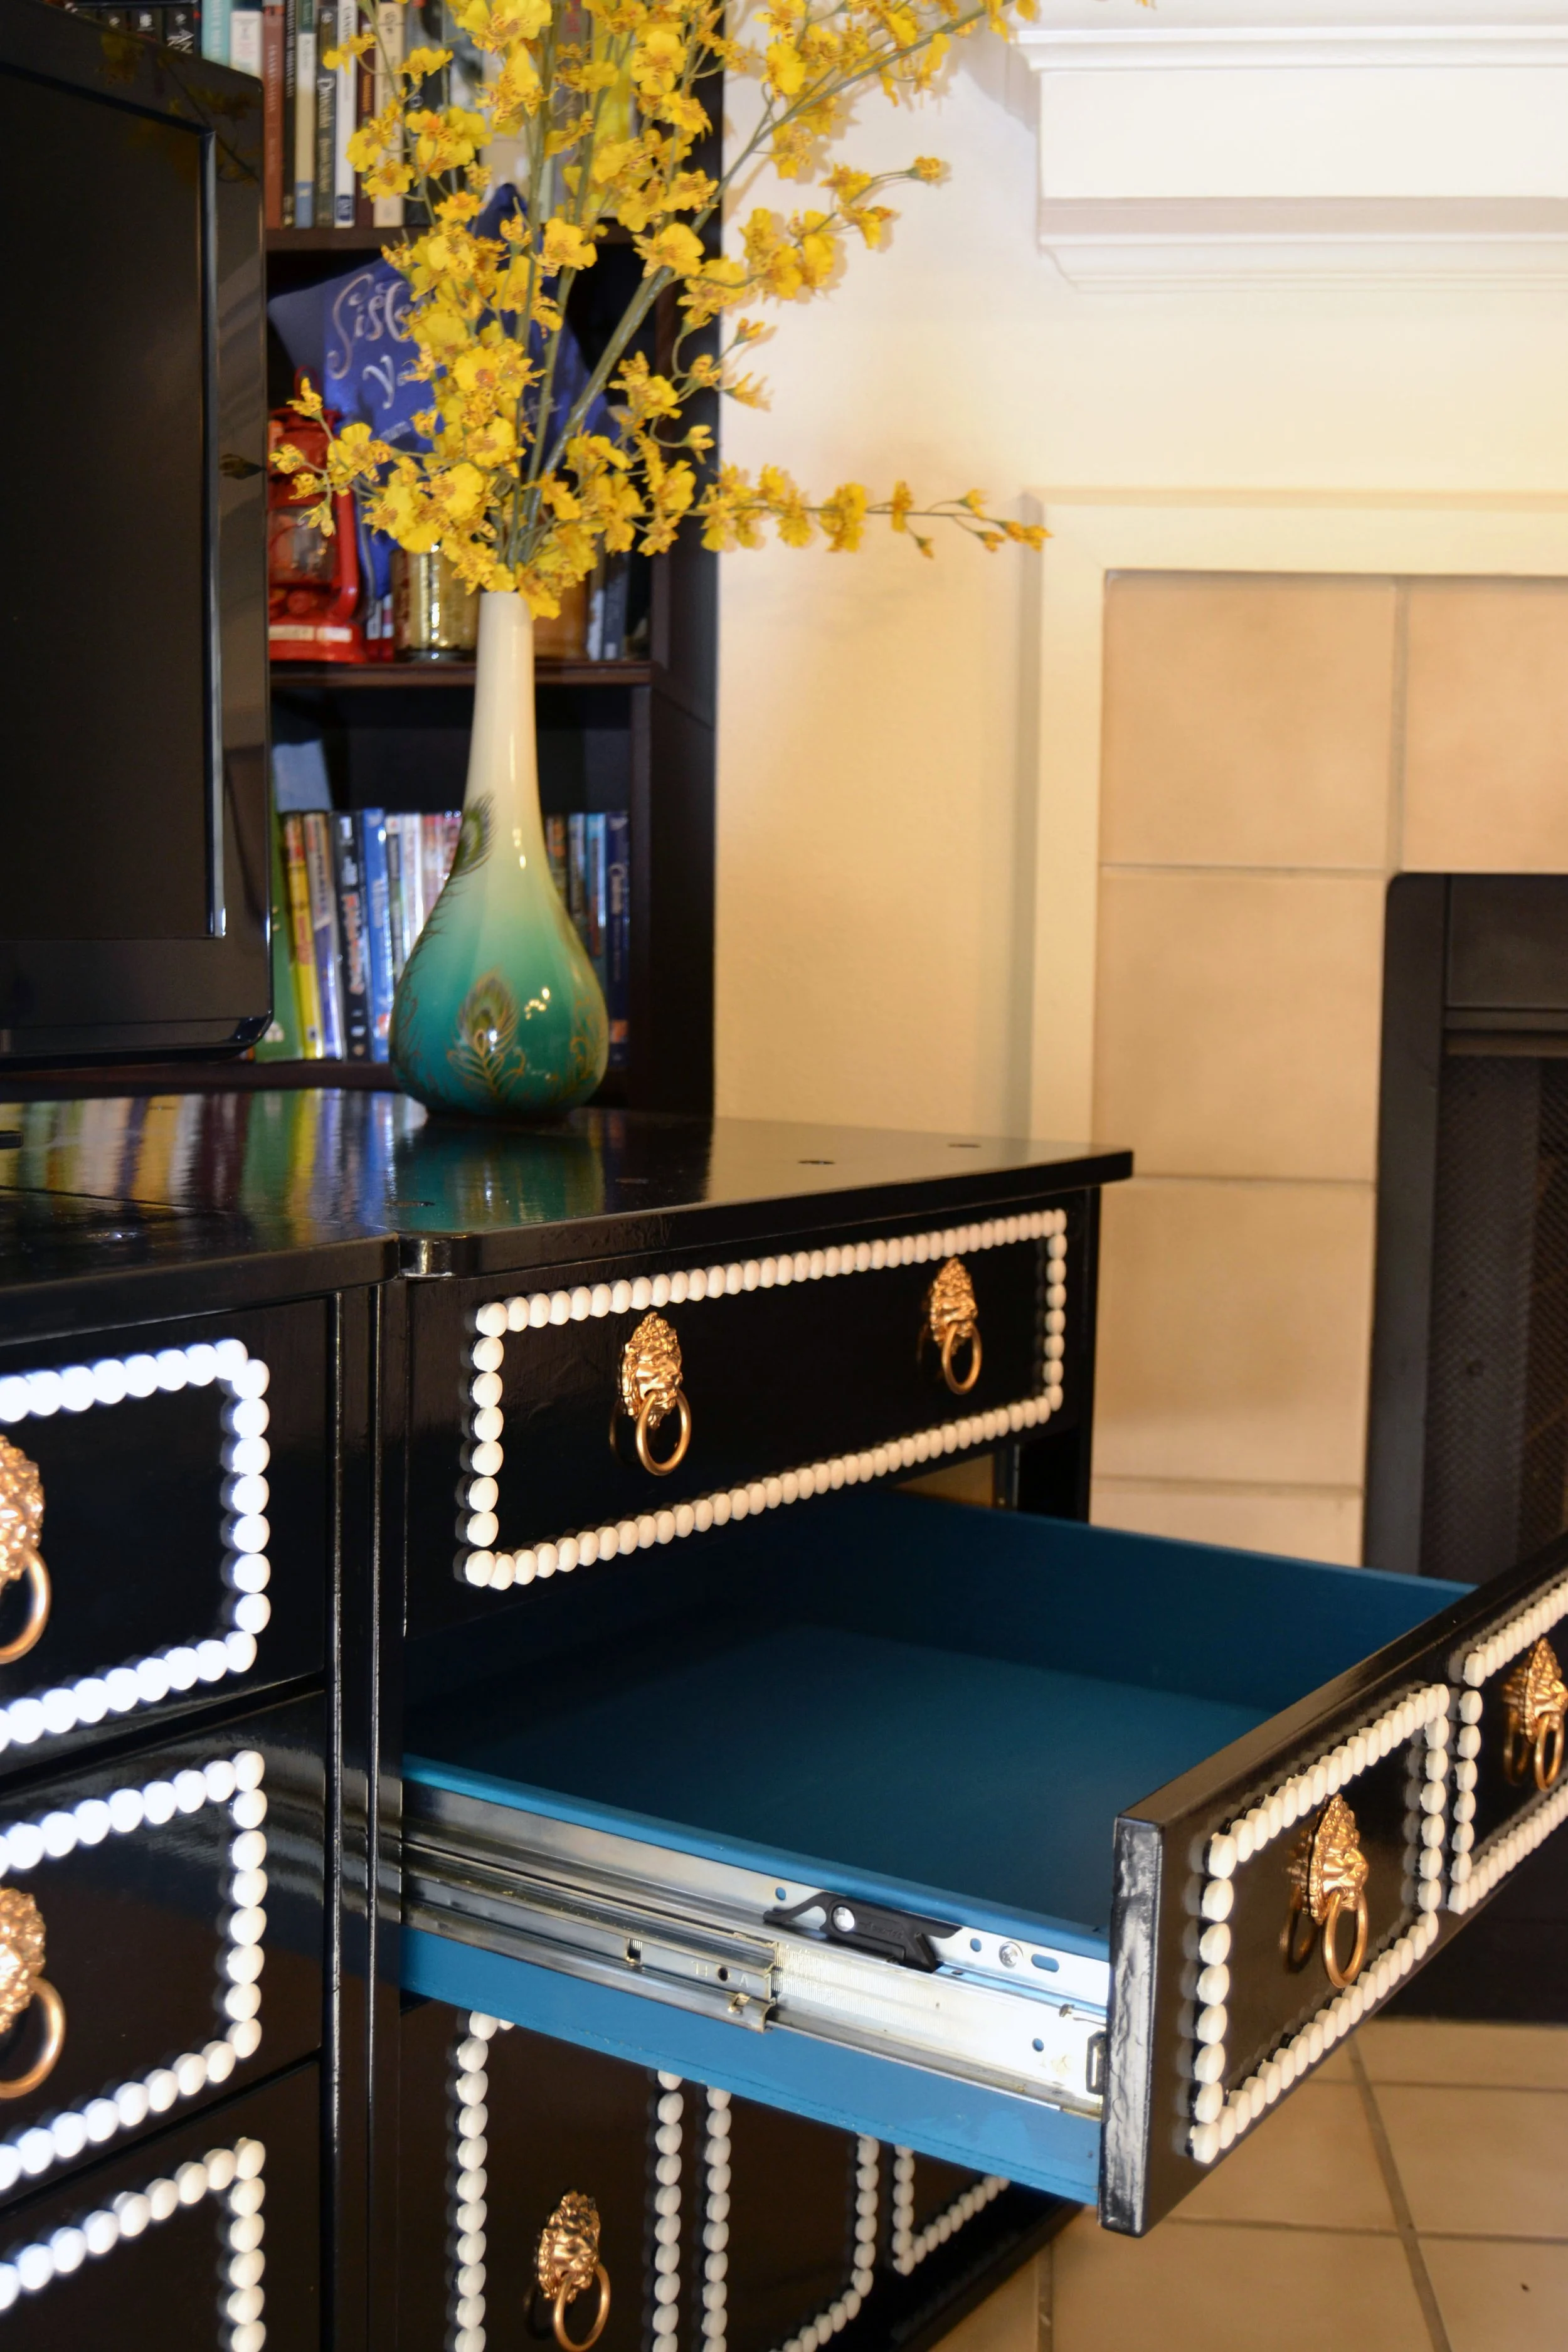
I made a few mockups of how I wanted the end product to look. After waffling between six possible looks, I finally settled on this one. Using a ruler and a pencil, I drew directly onto the wood to outline where I wanted the white rectangles to be placed.

Step 4: Add-ons
Each white rectangle is comprised of ½ inch wood dowel heads that are glued to the surface.
Step 5: Paint
A white primer was the first thing to be painted onto the cabinets and then two layers of black enamel paint everywhere except the dowel heads. I waited a couple of days for each layer of paint to dry, and I lightly sanded between each layer. The dowel headed rectangles were painted with two layers of white enamel paint.
Instead of using the bland old handles that were originally on the cabinets, I bought new ones, which I painted with gold liquid gilding to make the color pop more.
Later I decided to paint the insides of the drawers with teal paint leftover from a previous project.
Step 6: Screw in Hardware
I made new holes for the new pullies, screwed everything in, placed the drawers back to their rightful home, pushed the two cabinets together, and voila!
I must admit, it was a tedious project to get the cabinets to look like this.
Months later, I am still delighted with the results.